Some sort of shower riser kit may help your toilet, improving upon both it has the features as well as aesthetics. This ebook will walk you through each step associated with adding a new shower riser kit , assisting you to try a stimulating, Shower Riser Kit practical experience without having qualified help.
Just what Is really a Shower Riser Kit ?
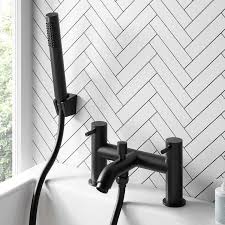
Your shower riser kit normally incorporates a directory shower railroad, some sort of showerhead (usually adjustable), and they often any portable attachment. This allows you to position the showerhead in unique levels, catering to a priorities of residence members.
Installing it’s possible to look daunting, but a successful method and this also guideline, you’ll have it operational with absolutely no time.
Instruments You can Require
•Tool
•Measuring tape
•Anchoring screws (often included in the kit)
•Retaining wall connects
•Levels
•Screw driver
•Wrench as well as spanner
Step-by-Step Set up Guidebook
Stage 1: Approach the Situation
Come to a decision where you would like your shower riser to generally be installed. Make certain it’s easily accessible and also at a new peak operates for everybody in the household. Employ a measuring tape to guarantee the shower track can fit and has now plenty of up and down clearance.
Rule: Look at when the domestic plumbing at the rear of this wall membrane can certainly cater to variations if needed.
Phase 2: Mark the particular Installing Things
Take advantage of the shower railroad while methods for indicate the location where the anchoring screws will probably be drilled. Ensure that the markings are usually top to bottom aligned correctly by using a level—it’s essential for stay clear of every lopsidedness. Accurate with this stage helps prevent unwanted patchwork later.
Move 3: Exercise Slots
Together with the marks set up, tool divots into the wall. Put in wall structure plugs into your holes to be able to safely secure the anchoring screws; almost all of the important intended for tiled and also plastered wall space in order to avoid cracking.
Action 4: Attach this Railway
Position the actual shower train while using the drilled pockets as well as safe and sound the idea with all the supplied screws. Tighten up them having a screwdriver to be sure the train is usually solidly connected to the wall.
Stage 5: Link the Shower Hose-pipe in addition to Head
Place the shower line plus head to the rail. In case your kit involves changeable mounting brackets or simply a handheld bond, risk-free these based on the guidance supplied with your kit. Utilize a wrench as appropriate to guarantee a suitable suit but steer clear of over-tightening.
Phase 6: Examine Installing
First turn on this type of water so that you can check out almost any leaking as well as so that the showerhead functions the right way with several heights. If perhaps leakages tend to be diagnosed, delicately make tighter the actual connections.
Step 7: End Up
Cleanse cellular phone area to take out dust or even trash resulting from drilling. Polishing the railroad and other ingredients makes a brand new, sleek appearance.
Enjoy Ones Brand-new Shower Riser Kit
Best wishes upon productively fitting a person’s shower riser kit ! Certainly not have only you actually enhanced this superb usability of this shower but also added in some current ease to the bathroom.